Friday, March 30, 2012

Goat Cheese Crostini

My favorite vegan goat cheese is a blend of vegan feta, non-dairy sour cream and non-dairy cream cheese (see full recipe below).  It makes for a deliciously tangy, creamy spread that will surprise those in your life still eating goat's milk cheeses.  This crostini could wear multiple hats: an hors d'oeuvre passed around with cocktails, part of an antipasto tasting plate, served alongside a leafy green salad or - my favorite - served with a big bowl of soup.

Ingredients:
  • 3 ounces prepared vegan goat cheese*
  • 1 teaspoon chopped fresh thyme
  • 2 teaspoons fresh-squeezed lemon juice
  • 1 minced garlic clove
  • 8 (1-ounce) slices sourdough bread
1. Combine the prepared goat cheese in a bowl with the thyme, lemon juice, and garlic.


2. Arrange the bread slices in a single layer on a jelly roll pan or baking sheet, and bake at 400 degrees for 8 minutes.


Note: definitely use a fresh loaf of sourdough, not presliced bread; you'll want that heftiness and freshness for the best results. 

3. Remove from the oven and turn the slices over; spread evenly with the goat cheese mixture (about a heaping tablespoon per bread slice).  Bake for an additional 5 minutes, until well toasted.

The crostini will be best served immediately.  Because they're crispy-crunchy, the crostini are perfect for dunking into a bowl of soup.  Tonight I paired with a store-bought white bean soup, but you could also try my White Bean Soup from this blog.


*To prepare the goat cheese, combine 3 ounces crumbled vegan feta (such as Veg Cuisine), 2 tablespoons Tofutti cream cheese, 1 tablespoon vegan sour cream, and a splash of lemon juice; mix with a fork until blended, and then proceed as directed in the recipe above.  You can prepare the goat cheese in advance and refrigerate until ready to use.

Nutrition Info:
4 servings (2 crostini), Calories 214 

Tasting Notes:
Absolutely delicious.  The lemon juice and sourdough both gave a tangy zip to the flavor, and the fresh thyme was great.  The bread was toasted to perfection - just slightly soft and chewy in the center, but crisp on the outside... and perfect with that bowl of soup.  I hadn't really anticipated the garlic flavor, but one bite and I knew this would be my new go to "garlic bread" for pasta nights in the future. 

Rating:
4

Thursday, March 29, 2012

Soft Polenta

Polenta is readily available in a tube at the grocery store, but homemade polenta is so much tastier and creamier.  This version cooks only until soft (polenta can also be firm, as in my Polenta with Cheese and Spinach), and is the perfect compliment to a big bowl of soup. You can play around with flavor variations by using broth instead of water, or switching to a different vegan cheese.  Tonight I used the mozzarella block from Galaxy foods, but this polenta is such a snap to make, I'll no doubt try it with other flavors soon.

Ingredients:
  • 4 cups boiling water
  • 1 tablespoons vegan butter
  • 1/4 teaspoon sea salt
  • 1 cup whole grain yellow cornmeal
  • 1/4 cup grated vegan cheese
1. Combine the boiling water, butter, and salt in a saucepan.  Gradually add the cornmeal, stirring constantly with a whisk. Return to a boil, stirring constantly.  (Note: this will happen in mere moments, since the water is already hot).


2. Reduce heat to low and cook for 25 minutes, stirring frequently - the polenta should be soft, but thick.  Remove from heat and stir in the cheese.  The polenta will be best served immediately, before it firms up.


I particularly liked the polenta served with mushroom soup. Try pairing with my Wild Mushroom Stew with Gremolata, or any canned vegan soup or stew.


Nutrition Info:
4 servings (3/4 cup), Calories 184 

Tasting Notes:
Wonderfully thick and creamy - in fact quite similar in texture and heartiness to mashed potatoes.  Although tasty, the flavor could definitely be stronger and needed some layering.  I'd use broth instead of water, and increase the butter a little.  I also recommend either chopped herbs, such as basil or thyme, or a little drizzle of truffle oil to liven up the flavor. You could also try plating the polenta in a bowl and spoon soup or stew right on top.

Rating:
3

Sunday, March 25, 2012

Cilantro Rice with Chicken

It's my final post in a week playing around with different varieties of rice. Tonight's recipe starts with a quick saute and then finishes in the oven, rather than simmering on the stove. It has a similar tomato topping to that from my recipe for Rice and Black Bean Salad with Cumin Dressing, but with a few tweaks and improvements.  Namely, I used a small tomato variety (I used grape, but cherry tomatoes would work too), and the topping is cooked this time to match the warmth of the rest of the dish. I also plated the topping on individual portions rather than plating the dish on a serving platter.

Ingredients:
For the rice:
  • 1 tablespoon olive oil
  • 2 cups quartered shiitake mushroom caps
  • 1/4 cup chopped green onion bottoms
  • 1 (1/2-inch) piece peeled fresh ginger
  • 1 crushed garlic clove
  • 2 cups uncooked long-grain rice*
  • 2 teaspoons ground cumin
  • 6 Gardein chick'n filets
  • 3 cups vegan chicken broth (such as Imagine)
For the sauce:
  • 2 cups loosely packed cilantro leaves
  • 1/2 cup vegan chicken broth (such as Imagine)
  • 2 tablespoons chopped green onion tops
  • 1 teaspoon peeled and chopped fresh ginger
  • 1/2 teaspoon coarse salt
  • 1 peeled garlic clove
For the topping:
  • 1 teaspoon olive oil
  • 2 cups halved grape tomatoes
  • 2 tablespoons chopped green onion tops
  • Cilantro sprigs (optional for garnish)
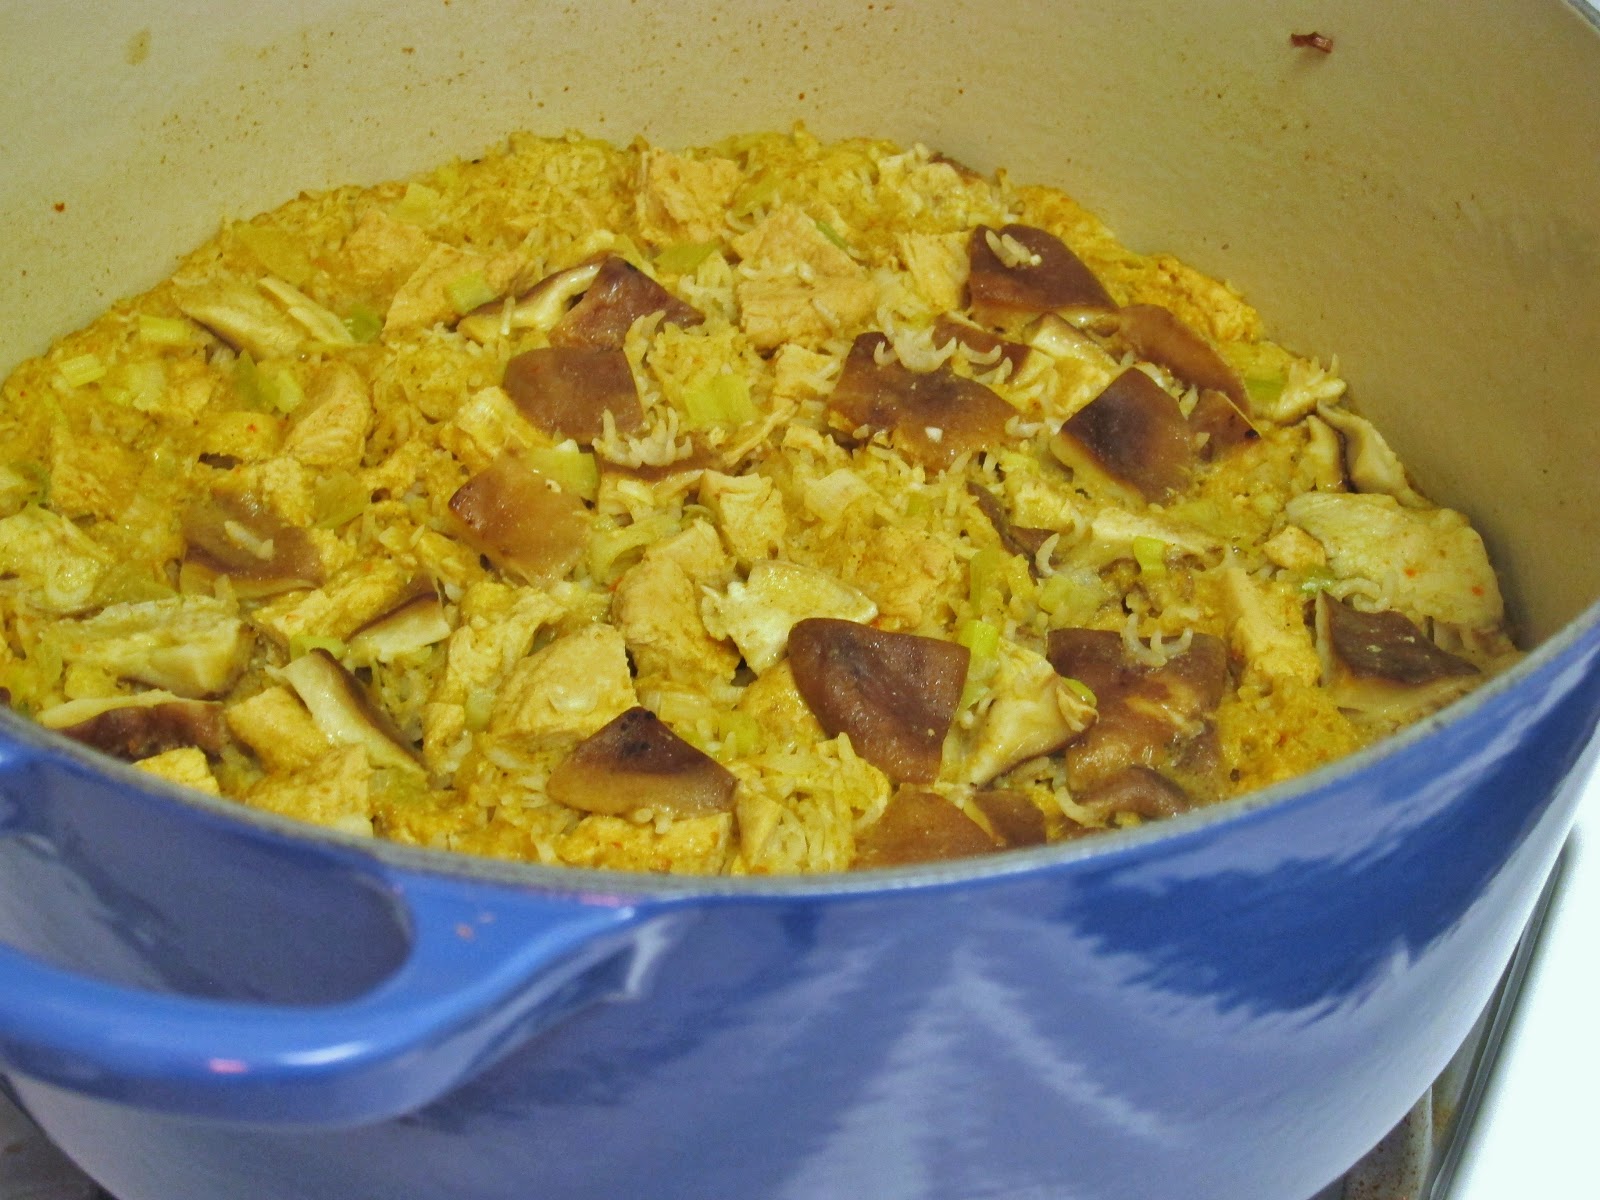
1. To prepare the rice, heat 1 tablespoon olive oil in a Dutch oven over medium heat.  Add the shiitake mushrooms, green onion bottoms, ginger piece, and crushed garlic.  Cook for 5 minutes, stirring frequently.  Cut the chicken into bite-sized pieces, and add to the pan, along with the rice and cumin; cook for 1 minute.  Stir in 3 cups broth and bring to a boil.


2. Cover and transfer to the oven.  Bake at 350 degrees for 25 minutes.  Remove from the oven and let stand - still covered - for 10 minutes.


3. Meanwhile, prepare the sauce: combine the cilantro leaves, 1/2 cup broth, 2 tablespoons green onion tops, chopped ginger, salt, and peeled garlic clove.


4. Process until smooth.  Stir the sauce into the baked rice, and discard the 1/2-inch garlic piece.


Note: as soon as I stirred the cilantro sauce into the rice mixture, I wished I had made this on St. Patrick's Day; it has the loveliest green tinge, without being over the top. 


4. To prepare the topping, heat the remaining teaspoon olive oil in a medium skillet over medium-low heat.  Add the tomatoes and cook for 2 minutes.  Stir in 2 tablespoons green onion tops.  


Serve 1 cup rice mixture on each of 8 plates, and top each serving with 1/4 cup tomato topping.  Garnish with cilantro sprigs, if desired, for a pretty presentation


*This main dish salad is a great way to showcase long-grain varieties.  I used white basmati tonight, but any long-grain variety (such as American long-grain or a hybrid like Texmati) would work. The key is to have a grain that is four to five times as long as it is wide.


Contrast that to short-grain rice, as in my Sushi-Rice Salad, which is so short compared to its width that it looks almost round.

Nutrition Info:
8 servings (1 cup rice, 1/4 cup tomato topping), Calories 339 

Tasting Notes:
Baking the rice mixture resulted in the most perfect fluffy rice I think I've ever cooked, so that was a great success.  The shiitake and Gardein chicken were earthy and yummy, but I was sad to find that the "green" taste of the cilantro sauce didn't live up to the beautiful green look of it.  Increase the cilantro, ginger, and garlic, and I recommend a splash of fresh lime juice as well.  As I hoped, the warm grape tomato topping was a nice contrasting flavor, but I'd cook the tomatoes even longer next time, until soft and sweet.

Rating:
3

Vegan Extra:
Now that I've given you so many rice dishes, you may be wondering what to do with all the leftover rice in your pantry.  Fret not: uncooked rice lasts practically forever.  But if you're short on pantry space and want to use it up in the near future, here are two simple and yummy ideas for lunches or side dishes.

Saute a few sliced garlic cloves in a saucepan.  Add uncooked rice and cook in vegan chicken broth (such as Imagine or Edward & Sons) instead of water.


Combine any leftover cooked rice with bottled vinaigrette, crumbled vegan feta (such as Veg Cuisine), chopped red onion, chopped carrot, chopped celery, and chopped bell pepper for a quick lunch.

Thursday, March 22, 2012

Rice and Black Bean Salad with Cumin Dressing

After Arborio, brown basmati, and jasmine rice, tonight I'm featuring parboiled rice.  Not to be confused with instant rice, the starch in parboiled rice has simply been treated in such a way that the grains won't stick together during cooking - the opposite, essentially, of what you'd want for sticky rice in Asian dishes.  The separate grains work perfectly in this salad.  The most common brand to look for is Uncle Ben's, and I prefer the brown over the white for its higher nutritional value.

Ingredients:
For the rice:
  • 1 teaspoon canola oil
  • 1 and 1/2 cups uncooked long-grain parboiled brown rice
  • 1/2 teaspoon ground turmeric
  • 1/2 teaspoon ground cumin
  • 3 and 1/3 cups water
  • 1/2 teaspoon coarse salt
  • 1 cup frozen corn kernels, thawed
  • 1/2 cup finely chopped, seeded, and peeled cucumber
  • 1/2 cup finely chopped red bell pepper
  • 1/2 cup finely chopped green onions
  • 1/4 cup chopped fresh cilantro
  • 1 tablespoon minced and seeded jalapeno pepper
  • 1 (15-ounce) rinsed and drained can black beans
For the dressing:
  • 1 teaspoon ground cumin
  • 6 tablespoons fresh-squeezed lime juice
  • 3 tablespoons canola oil
  • 2 tablespoons water
  • 1/2 teaspoon coarse salt
  • 1 minced garlic clove
For the topping:
  • 2 cups thin wedges plum tomato
  • 1 tablespoon fresh-squeezed lime juice
  • 1/8 teaspoon coarse salt
1. To prepare the rice, heat 1 teaspoon canola oil in a large skillet or saucepan over medium heat. Add the rice and cook for 1 minute; stir in the turmeric and 1/2 teaspoon cumin.  Add 3 and 1/3 cups water and 1/2 teaspoon salt; bring to a boil.  Cover, reduce heat, and simmer for 25 to 30 minutes, until the liquid is all absorbed.

2. Remove from heat and cool to room temperature.  Stir in the corn, cucumber, red bell pepper, green onions, cilantro, jalapeno, and black beans.


3. To prepare the dressing, heat the remaining 1 teaspoon cumin in a small skillet over low heat for 30 seconds, until it smells fragrant.  Remove from heat and add 6 tablespoons lime juice, 3 tablespoons canola oil, 2 tablespoons water, 1/2 teaspoon salt, and the garlic.  Add the dressing to the rice mixture.


4. To prepare the topping, combine the plum tomato in a bowl with the final tablespoon lime juice and 1/8 teaspoon salt.  Spoon the rice salad onto a platter, and top with the tomato topping. 


Nutrition Info:
6 servings (1 and 1/3 cups), Calories 365

Tasting Notes:
A nice blend of flavors: great fresh lime, and tasty black beans, cilantro, and tomato.  I'd leave the seeds in the jalapeno for a bit more heat, not something I normally say.  Although tasty on its own, the dish felt a little... limp.  I'd wrap it in flour tortillas or spoon into hard taco shells next time, to make it a main dish meal.  Although visually interesting, I'm not sure the tomato topping was worth the extra preparation; I'd chop the plum tomato and add to the salad with the corn and other veggies next time.

Rating:
3.5

Wednesday, March 21, 2012

Cinnamon Rice Pudding with Dried-Cherry Sauce

I'm on a rice kick these days, playing around with recipes that show how versatile these simple grains can be.  Rice isn't just for the dinner table of course; simmer in your favorite non-dairy milk for a creamy rice pudding dessert.  An aromatic rice like jasmine works well for this application.

Ingredients:
For the pudding:
  • 6 cups water
  • 1 and 1/2 cups uncooked jasmine rice
  • 1 teaspoon coarse salt
  • 1 cinnamon stick
  • 3 cups plain non-dairy milk
  • 1/2 cup vegan sugar
  • 1 teaspoon ground cinnamon
  • 1 teaspoon vanilla extract
  • 1/2 teaspoon almond extract
For the sauce:
  • 1 cup dried tart cherries
  • 1 and 1/2 cups water
  • 2 tablespoons vegan sugar
  • 1 tablespoon water
  • 1 teaspoon cornstarch
  • 1/2 teaspoon vanilla extract
  • 1/4 teaspoon almond extract
1. To make the pudding, combine 6 cups water, the rice, salt, and cinnamon stick in a large saucepan - use a heavy saucepan or you risk scorching the pudding while it cooks.  Bring to a boil, then reduce heat and simmer, uncovered, for 20 minutes.  Drain.

2. Return the rice and the cinnamon stick to the pan, and add the milk, 1/2 cup sugar, and ground cinnamon.  Bring to a simmer over medium heat, stirring constantly. 


3. Reduce heat to medium-low and continue to cook for 30 minutes, stirring frequently; the pudding should be thick by the end.  Discard the cinnamon stick.  Remove from heat and stir in 1 teaspoon vanilla extract and 1/2 teaspoon almond extract.

4. While the pudding simmers, prepare the sauce: combine the dried cherries in a saucepan with 1 and 1/2 cups water.  Bring to a boil.  Reduce heat and simmer for 20 minutes.  Stir in 2 tablespoons sugar and cook for an additional 5 minutes.


5. Whisk together 1 tablespoon water and the cornstarch.  Add to the cherry sauce and bring to a boil; cook for a final minute or so, until slightly thick, stirring constantly.  Remove from heat and stir in 1/2 teaspoon vanilla extract and 1/4 teaspoon almond extract.

Divide the pudding evenly among 8 dessert bowls, and top evenly with the sauce.


Nutrition Info:
8 servings (3/4 cup pudding, about 2 and 1/2 tablespoons sauce), Calories 290 

Tasting Notes:
My new favorite rice pudding.  The sauce tasted like a not-too-sweet cherry pie filling, and the rice pudding was cooked to perfection - tender, and creamy, but not mushy.  I loved the hints of cinnamon.


Update: I liked the pudding chilled the next day even better, so go ahead and prepare in advance.  I'm still withholding a "5" rating, however, because the strong cherry flavor detracted from my favorite part: the cinnamon, mmmm.  Next time I'll skip the almond extract in the cherry sauce and use ground cinnamon or cinnamon extract instead.

Rating:
4

Tuesday, March 20, 2012

Spiced Brown Basmati Pilaf

I started off this month with a rice dish (see post for Lemon Risotto with Asparagus), which required a medium-grain rice like Arborio, capable of absorbing large quantities of liquid.  I plan to feature several other rice dishes over the next few days, to highlight how versatile this staple can be.

Pilaf is similar to risotto, in that rice soaks up a lot of liquid, but if risotto is a labor of love, requiring almost constant stirring, pilaf is for lovers of ease.  Bring the ingredients to a boil, reduce heat, and simmer unattended until the liquid is absorbed.  Long-grain rices such as basmati are more suited to the pilaf style, as a result.  Using brown basmati gives this dish a nutty flavor, along with vitamins, minerals, and fiber.  This recipe would also be great with red rice - a nutty, chewy variety that yields a heartier, more rustic version.

Ingredients:
  • 1 tablespoon canola oil
  • 1 cup chopped onion
  • 2 cups uncooked brown basmati rice
  • 1/2 cup golden raisins*
  • 3 whole cloves
  • 1 cinnamon stick
  • 1 cup water
  • 2 tablespoons tomato paste
  • 1 teaspoon salt
  • 28 ounces vegan chicken broth (prepared from Not Chick'n bouillon)
  • 1/4 cup chopped pistachios
1. Heat the canola oil in a large skillet over medium heat.  Add the onion and cook for 10 minutes, stirring frequently.  Stir in the rice, raisins, cloves, and cinnamon stick.


2. Add the water, tomato paste, salt, and chicken broth.  Bring to a boil.  Cover, reduce heat, and simmer until the liquid is absorbed.  Brown rice normally takes about 50 minutes in a 2:1 liquid-to-rice ratio, but because there is more liquid in this dish, plan on it taking longer than that. 


3. Let stand for 5 minutes before discarding the cloves and cinnamon stick; sprinkle with the pistachios.

Make your pilaf the center of the meal, or a side dish to your favorite Gardein chicken.

*Choose a brand like International Harvest, which sells naturally golden hunza raisins, which aren't treated with sulfur dioxide.

Nutrition Info:
10 servings (about 3/4 cup), Calories 205

Tasting Notes:
Well darn, there's definite potential here, but I'd make a rather significant change next time.  I really didn't like the tomato paste in combination with the cinnamon, clove, and golden raisin; next time I'd stick with the sweet elements of this dish, and save the tomato paste for a more savory pilaf.  The nuttiness of the brown rice is also quite powerful, and I think I'd prefer it with white basmati, even though - I know, I know - it's not quite as nutritious.  Make those tweaks and this will become a keeper.

Rating:
3

Sunday, March 18, 2012

Chocolate and Berry-Covered Meringue

If you follow my blog, then you know I'm in awe of Ener-G egg replacer.  It works for everything from the simple (a binder in cakes, muffins, and other baked goods) to the downright amazing (my Blueberry Angel Food Cake).  Ever since I made angel food cake last summer, I've had a hunch that this deceptively-innocent looking white powder could become meringue, as well.  Tonight, I'm putting the theory to the test.

Ingredients:
For the meringue:
  • 4 Ener-G eggs
  • Dash of salt
  • 1 teaspoon fresh-squeezed lemon juice
  • 1/2 teaspoon vanilla extract
  • 3/4 cup vegan sugar
For the topping:
  • 1/4 cup chopped dark chocolate
  • 4 teaspoons water
  • 2 cups fresh blueberries
  • 2 cups fresh raspberries
  • Mint sprigs (optional for garnish)
1. To start, line a baking sheet with parchment paper, and draw a 9-inch circle on the paper.  Turn the paper over and secure with masking tape.  Set aside.


2. In a large bowl, whisk together the Ener-G eggs and salt; beat with a hand mixer for 12 minutes.  After the first 3 minutes, add the vanilla and lemon juice, while continuing to beat.  At the 6 minute mark, begin adding the sugar, 1 tablespoon at a time, while continuing to beat.  By the end, you'll have thick "stiff peaks" like beaten egg whites.

3. Carefully spoon your meringue into the circle you've drawn, and shape into a nest with 1-inch tall sides using the back of a spoon. 


4. Bake at 200 degrees for 1 hour.  Turn the oven off, but leave the door closed; let the meringue cool in the closed oven for 30 minutes.  Remove from the oven and carefully peel off the parchment paper.

5.  To prepare the topping, combine the dark chocolate and water in a small glass bowl.  Microwave at 20 second intervals for about 1 minute, until melted.

6. Place the meringue on a platter, and arrange the berries in the "nest" you've created. 


7. Drizzle with the chocolate sauce.  Mint sprigs make a pretty garnish of contrasting color. 


You could also get a bit more decadent and top with Soya Too whipped cream, and add additional berries such as strawberries.

Nutrition Info:
8 servings (1 slice), Calories 142 

Tasting Notes:
First, the meringue was exactly what I imagined - crispy at first bite, then melt in your mouth, with a sugary, vanilla taste; my husband, who still eats real eggs, declared this an exact match for egg white meringues.  While the edges stayed perfect, I was disappointed that the meringue became soggy in the center underneath the berries (making this hard to photograph in its entirety).  Letting it set and cool longer in the closed oven might solve the problem.  Try an hour and see if you have better luck.  I also didn't think that tempering and drizzling the chocolate was worth the extra effort; go ahead and use a vegan chocolate syrup like Ah-laska instead.  But again, I was so pleased with my meringue.  Next I might try this for bite-sized cookies.


Update: the meringue stayed crisp in an air-tight container for about 2 days.  By the third day, it had lost that initial crunch and become a tad chewy, at which point it tasted a bit like...vegan marshmallows.  Not a bad discovery.

Rating:
3.5

Thursday, March 15, 2012

Quick Vegetarian Chili with Avocado Salsa

I'm making another two-part recipe tonight - a bowlful of hearty veggie chili, and a super fresh salsa that goes on top.  This chili is quick to make, and relies on convenient ingredients, but the fresh avocado salsa gives an otherwise ordinary bowlful a bit of flair, plus heart-healthy fats.  You can make the chili in advance (it will keep up to 2 days in an airtight container in the fridge), but prepare the avocado salsa just before serving.

Ingredients:
For the Avocado Salsa:
  • 1/2 cup peeled and finely chopped avocado
  • 1/3 cup chopped and seeded tomato
  • 2 tablespoons finely chopped onion
  • 1 tablespoon finely chopped and seeded jalapeno pepper
  • 1 tablespoon chopped fresh cilantro
  • 1 tablespoon fresh-squeezed lime juice
  • 1/8 teaspoon salt
1. Combine all of the salsa ingredients in a bowl, mixing together gently.


Nutrition Info:
6 servings (about 2 and 1/2 tablespoons), Calories 59

As mentioned, serve immediately, whether over this chili or with your favorite tortilla chips.  If you're planning to make the chili, then read on.

Ingredients:
  • 2 teaspoons canola oil
  • 1 cup chopped onion
  • 1 cup chopped red bell pepper
  • 2 teaspoons chili powder
  • 1 teaspoon ground cumin
  • 1 teaspoon dried oregano
  • 3 minced garlic cloves
  • 1 (4.5-ounce) can chopped green chiles
  • 2/3 cup uncooked quick-cooking barley (such as Mother's)
  • 1/4 cup water
  • 1 (15-ounce) drained can black beans
  • 1 (14.5-ounce) undrained can no-salt-added diced tomatoes
  • 1 and 3/4 cups vegetable broth
  • 3 tablespoons chopped fresh cilantro
  • 6 tablespoons vegan sour cream
  • 6 lime wedges
  • 18 baked tortilla chips
  • 1 recipe Avocado Salsa
1. Heat the canola oil in a Dutch oven over medium-high heat.  Add the onion and bell pepper; saute for 3 minutes.

2. Add the chili powder, cumin, oregano, garlic, and canned green chiles; cook for 1 minute.  Stir in the barley, water, black beans, canned tomatoes, and vegetable broth; bring to a boil.  Cover, reduce heat, and simmer for 20 minutes.


Note: this is the perfect time to toss together the ingredients for the Avocado Salsa.

3. Stir the cilantro into the chili, and ladle 1 cup chili into each of 6 bowls.  Top each serving with 1 tablespoon sour cream, 1 lime wedge, 3 tortilla chips, and 2 and 1/2 tablespoons Avocado Salsa.


Nutrition Info:
6 servings (1 cup chili, 1 tablespoon sour cream, 1 lime wedge, 3 chips, 2 and 1/2 tablespoons salsa), Calories 313 

Tasting Notes:
I was surprised to find the chili a little bland;  I'd increase the spices all around next time, and maybe use fire-roasted canned tomatoes instead of plain.  The barley also felt oddly out of place in a chili.  Instead, try 2 cans of beans, or stick with 1 can of beans and stir in meatless crumbles (from Yves Veggie or Lightlife) instead.  The Avocado Salsa had nice fresh flavors of lime and avocado, but that was overpowered by the hot chili underneath. Next time I'll prepare a double batch of salsa and pile on more per serving.

Rating:
3

Wednesday, March 14, 2012

Anticuchos with Roasted Yellow Pepper Sauce (Peruvian Beef Kebabs)

Anticuchos are beef kebabs popular in Peru and other parts of South America, where the skewers are often sold from street carts and food stalls.  Gardein's cubed beefless tips (sold in the freezer section) are the perfect size and shape to make these tasty skewers vegan. 

There are two components to tonight's post: the kebabs themselves, and a vibrant yellow pepper dipping sauce to serve on the side.

Ingredients:
For the Roasted Yellow Pepper Sauce:
  • 1 large yellow bell pepper
  • 1/4 cup finely chopped green onions
  • 2 tablespoons white vinegar
  • 1 tablespoon water
  • 1 tablespoon olive oil
  • 1 tablespoon fresh-squeezed lemon juice
  • 1 teaspoon ground cumin
  • 1 teaspoon ground aji amarillo*
  • 1/2 teaspoon ground turmeric
  • 1/4 teaspoon salt
  • 1/4 teaspoon black pepper
  • 1 minced garlic clove
1. Cut the bell pepper in half lengthwise and discard the seeds and membranes.  Place, skin sides up, on a baking sheet lined with aluminum foil and flatten with your palm.  Broil for 15 minutes, until blackened.  Transfer the pepper halves to a zip-top plastic bag and seal; let stand for 15 minutes.  Remove form the bag, peel off the skins, and coarsely chop.


2. Combine the bell pepper in a blender with all the remaining sauce ingredients.  Process until smooth.

Nutrition Info:
6 servings (about 2 and 1/2 tablespoons), Calories 55

And now moving on to the kebabs...

Ingredients:
For the beefless tips:
  • 2 (9-ounce) packages Gardein beefless tips, defrosted
  • 3 tablespoons red wine vinegar
  • 2 teaspoons ground aji amarillo*
  • 1 teaspoon salt
  • 1 teaspoon black pepper
  • 1/2 teaspoon ground cumin
  • 1/2 teaspoon ground turmeric
For the fiery rub:
  • 3 tablespoons chopped flat-leaf parsley
  • 1 teaspoon salt
  • 1 teaspoon ground aji amarillo*
  • 1/2 teaspoon black pepper
  • 1/4 teaspoon ground turmeric
  • Cooking spray
1. Combine all the ingredients for the beefless tips in a large bowl.  Cover and chill for 3 hours.

2. Combine all the ingredients for the fiery rub except the cooking spray in a small bowl.  Set aside.


3. Divide the beefless tips evenly among 6 skewers, and press the fiery rub onto the beefless tips.  Cook the kebabs on an outdoor grill or indoor grill pan coated with cooking spray for 6 minutes, turning over halfway through. 


Serve with the Roasted Yellow Pepper Sauce.


*For authentic taste, I do recommend seeking out aji amarillo, a spicy yellow chile; I purchased a jar through Amazon.com.  If you can't find it, however, hot paprika is your best bet as a substitute.


Nutrition Info:
6 servings (1 kebab, about 2 and1/2 tablespoons sauce), Calories 188 

Tasting Notes:
Incredible!  And yes I'm aware that a good part of that is due to the amount of salt.  Although I wouldn't recommended that much sodium on a daily (or even weekly!) basis, you must try this recipe at least once.  The smell of the spices will make your mouth water before you even take a bite, and then the flavor pop is amazing - very spicy, as expected from a recipe that includes a "fiery rub," but in a perfect way, not an overpowering way.  The Gardein beef is juicy and tender, and the saltiness and spiciness of the rub had a pleasing crunch.  The yellow pepper sauce was also wonderful; a touch vinegary, but spicy and salty with hints of sweetness, and just perfect over the Gardein.  My husband asks me to include, "That was a 5."  Indeed.

Rating:
5

Monday, March 12, 2012

Sesame Quinoa with Tofu

This easy quinoa recipe is the last in a series made with my homemade vegetable stock.  I probably don't have to tell you by now that quinoa is a "complete" protein, and packed with vitamins, including manganese and folate.  I still remember the first time I cooked with it (about a decade ago), when I walked far out of my way in the D.C. area to find it in a bulk bin at Whole Foods, and asked a salesperson for kwin-oh-ah.  Luckily by now I've learned how to pronounce it, and it's also far more readily available in most supermarkets. If you haven't made the vegetable stock, go ahead and use water instead.

Ingredients:
  • 8 ounces extra-firm tofu
  • 1 teaspoon olive oil
  • 1 tablespoon sesame seeds
  • 1 cup uncooked quinoa
  • 1 and 1/2 cups Vegetable Stock
  • 1/4 teaspoon salt
  • 1/2 cup chopped green onions
  • 1 tablespoon low-sodium soy sauce
  • 1/8 teaspoon black pepper
1. Place the tofu on several layers of paper towels and let stand for 20 minutes.  Cut into 1/2-inch cubes.

2. Heat the olive oil in a saucepan over medium heat.  Add the tofu and sesame seeds; saute for 3 minutes.  Remove the tofu mixture from the pan.


3. Add the quinoa to the pan and cook for 3 minutes, stirring frequently.  Add the stock and salt; bring to a boil.  Cover, reduce heat, and simmer for 20 minutes.  Place the quinoa in a large bowl and add the tofu mixture, green onions, soy sauce, and black pepper, tossing to coat.

To continue with the Asian flavors of this dish, I served with miso soup. You can try packaged miso soup from the store, or make the Miso Soup with Spring Greens on this blog.


Nutrition Info:
4 servings (1 cup), Calories 274 

Tasting Notes:
A very simple, weeknight preparation of quinoa, nothing fancy.  I would play up the sesame factor by sauteeing in sesame oil next time, and drizzling with a little bit of additional oil just before serving.  1 tablespoon soy sauce was very light-handed; I'd go ahead and increase that, too.  The dish also was just crying out for some veggie additions - fresh peas and thinly sliced carrot kept springing to mind.  Play around and let me know what fun variations you come up with.

Rating:
3